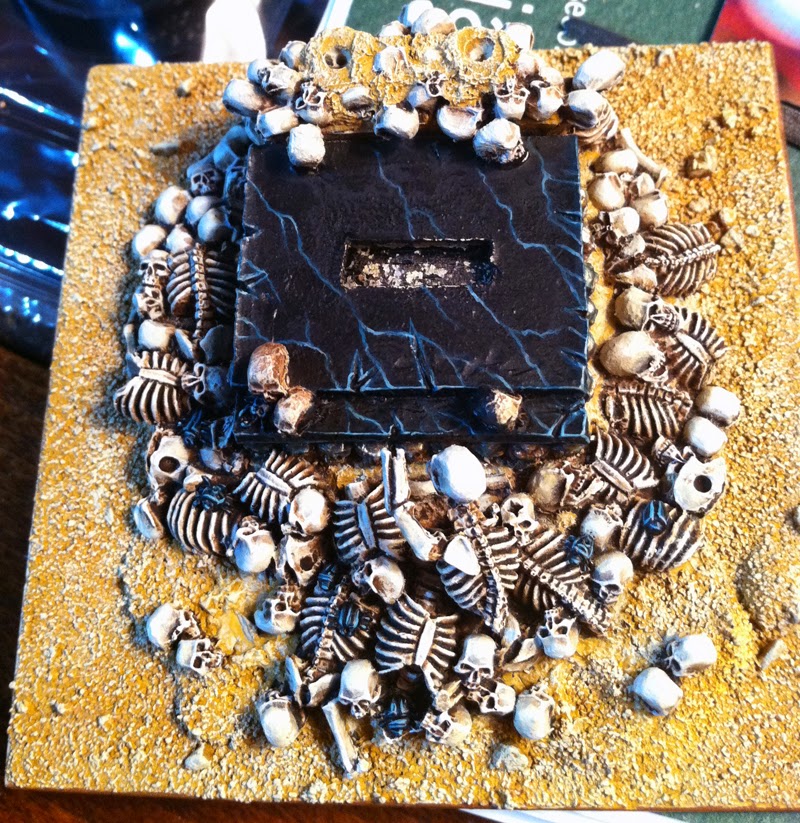
I have been asked several times how I paint the marble effect on my Tomb Kings army, and luckily I just so happened to be painting some more marble on my Casket of Souls. With that in mind I put together this little tutorial on how to paint black marble.
Step 1
First step is to paint the entire area that is going to be marble with an even coat of black.
Step 2
Next you choose your color that you want to tint the marble. Like I said above, this can be nearly any color, but it works best with cooler colors. I use Hawk Turquoise. I mixed a little bit of the turquoise into the black and made sure to highlight all of the edges. Once that is done I started painting random, forking lines across the flat surfaces. They look a little like lightning bolts, but less jagged and longer. You want to make sure that you paint these all going in the same general direction, but let them meander a bit. They should look random and natural, which is a harder effect to achieve then you may think.
Step 3
For the next step I just added even more turquoise in. At this stage it's more equivalent to turquoise with a little bit of black added in. You don't want to use the color straight out of the pot, because the black will help tie it into the rest of the stone, plus you don't want it to be to vibrant. I than re-highlighted all of the edges but with a smaller more precise line. I also retraced all of my jagged, marble lines, but made sure to make the new line smaller.
Step 4 & 5
Now I forgot to take a picture in between so this is actually two steps. Using my mix from the last step I added in a little bit of white paint. Again, I wanted to make sure there was a little bit of black in the original mix since it dulls down the vibrancy. With this new mix I repeated the last step, but made sure the lines were even sharper and smaller. If you are not to confident in your brush control it may pay off to make your highlights from the first step a little broader then normal so you can paint smaller lines inside of them later.
Once that is done I added even more white, it's going to be pretty bright at this stage. This highlight is slightly different. Instead of retracing everything we are going to be a lot more selective with it. I hit all of the corners, including the corners on any cracks, as well as a few random areas along the longer edges. I also picked random areas along the marble lines to highlight. You can see in the picture above how just small sections on the jagged lines are brightest. This gives it a more random and natural feel.
Step 6
The last step is to give the whole thing a glaze with slightly watered down Nuln Oil. This helps dull down the super bright highlights and ties everything together. Make sure you apply it as a glaze though, not a wash. This means you just want a thin, even coat of it over everything. Don't let it pool in the cracks.
Now if you look at the Stalker picture at the top you can see that there are also some white light reflections. This is optional. I haven't decided yet whether I want to do that on my Casket so I have left it off for now. To paint those all you need to do is pick a direction for your light source to be coming from and paint all of you light reflections facing that direction. Generally you want to pick out points and other high areas, but there are times you will also want to put this on a flatter surface. This requires a little bit of knowledge in light theory and a slightly more advanced understanding of painting to put the reflections in all the right spots. If you are not sure than I suggest you just give it a try and over time you will pick up on it more. Just look at some naturally shiny objects in real life and see how the light reflects off of them.
I hope that helped and if you have any questions on what I did or any other techniques you want to learn just let me know in the comments below.
Until next time,
Tyler M.


No comments:
Post a Comment